How to measure speed with LM393 Sensor Module and Arduino?
With this sensor and the arduino, the RPM and / or speed of an motor can be easily measured. The following code is used to measure the engine speed. For the speed calculation, the diameter of the wheel turned by the engine can be calculated by multiplying the number of revolutions per minute.
It is recommended that you use the LM393 Speed Sensor with 3.3 Volts. If it is to be used with 5v, stable operation can be achieved by connecting 100nF capacitor between D0 and GND.
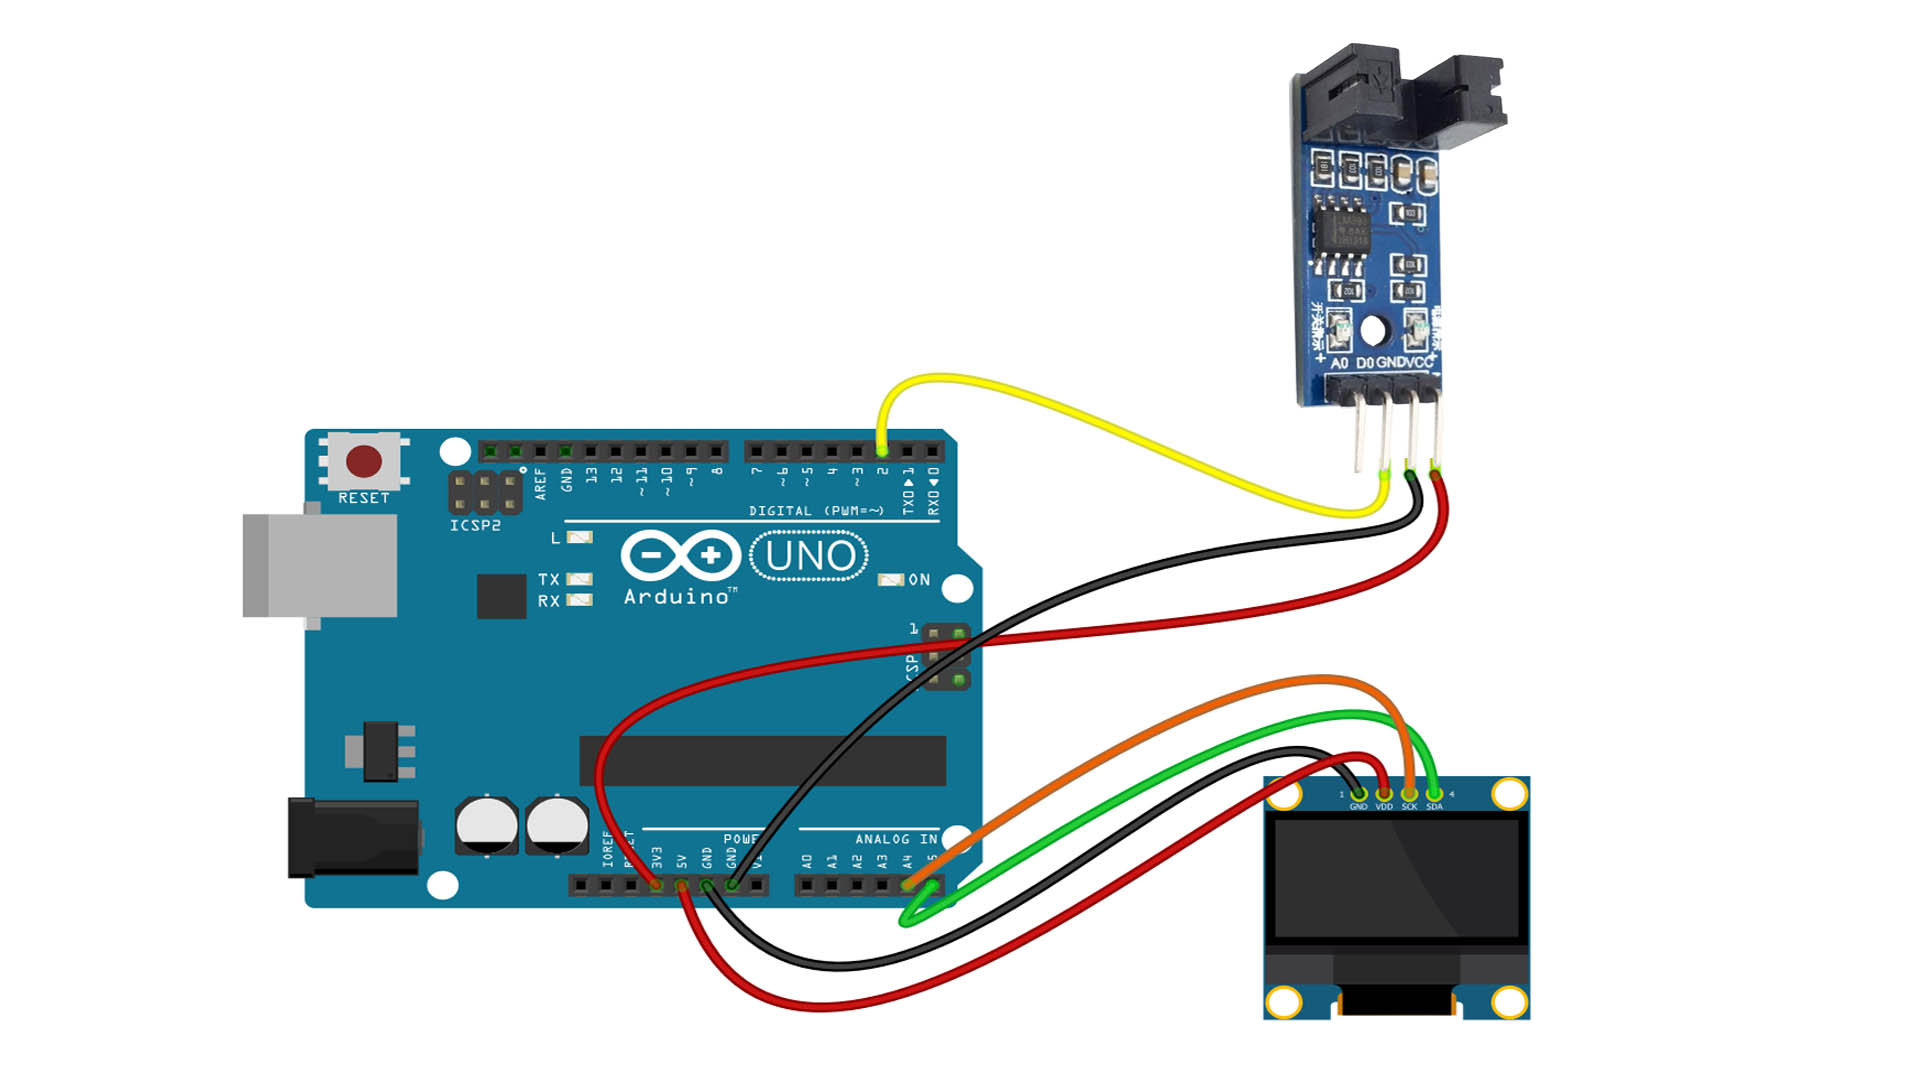
Sensor Leg connections:
Sensor VCC – Arduino 3.3V
Sensor GND – Arduino GND
Sensor D0 – Arduino Pin 2
OLED Screen Connections:
OLED VCC – Arduino 5V
OLED GND – Arduino GND
OLED SCL – Arduino A5
OLED SDA – Arduino A4
Arduino Code:
#include <SPI.h>
#include <Wire.h>
#include <Adafruit_GFX.h>
#include <Adafruit_SSD1306.h>
#define OLED_RESET 4
Adafruit_SSD1306 display(OLED_RESET);

unsigned int rpm;
volatile byte pulses;
unsigned long timeold;
unsigned int pulsesperturn = 2; // kanat sayısı (Tek kanat varsa 1 olmalı). Eğer 20 gözlü devir tekerleği kullanılıyorsa bu değer 20 olmalıdır.

void counter()
{
  pulses++;
}

void setup()
{
  Serial.begin(115200);
  display.begin(SSD1306_SWITCHCAPVCC, 0x3C);
  pinMode(2, INPUT); // 2 nolu pin giriş pini olarak kullanılıyor.

  attachInterrupt(0, counter, RISING);
  pulses  = 0;
  rpm     = 0;
  timeold = 0;

}

void loop()
{

  if (millis() - timeold >= 1000)
  {

    detachInterrupt(0);
    rpm = (60 * 1000 / pulsesperturn ) / (millis() - timeold) * pulses; // HC-020K sensorü için 30*500 -- LM393 sensörü için 60*1000 olmalı
    timeold = millis();
    pulses = 0;

display.clearDisplay();
display.setTextSize(2);
display.setTextColor(WHITE);
display.setCursor(8,0);
display.print("DEVIR RPM");
display.setCursor(38,28);
display.setTextSize(3);
display.println(rpm);
display.display();

    attachInterrupt(0, counter, RISING);
  }
}