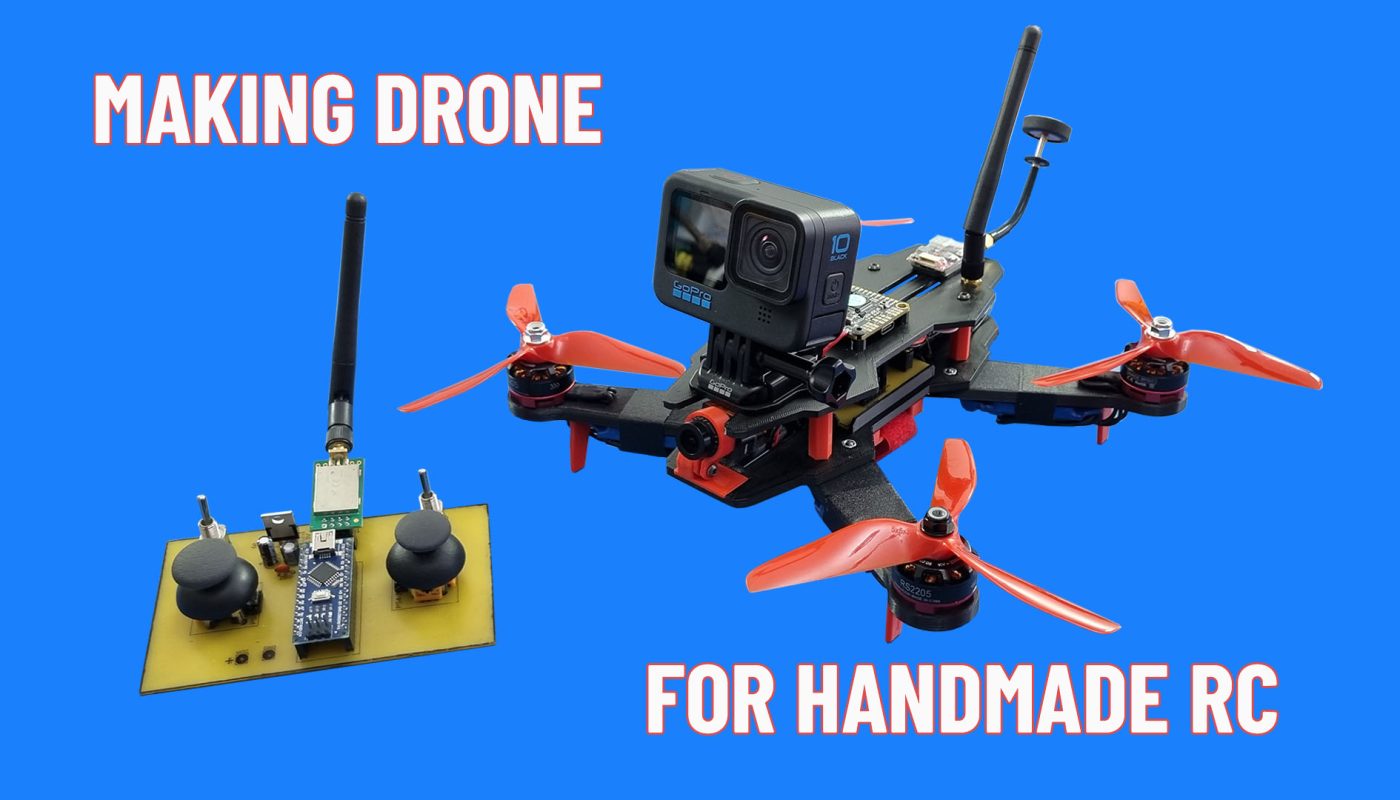
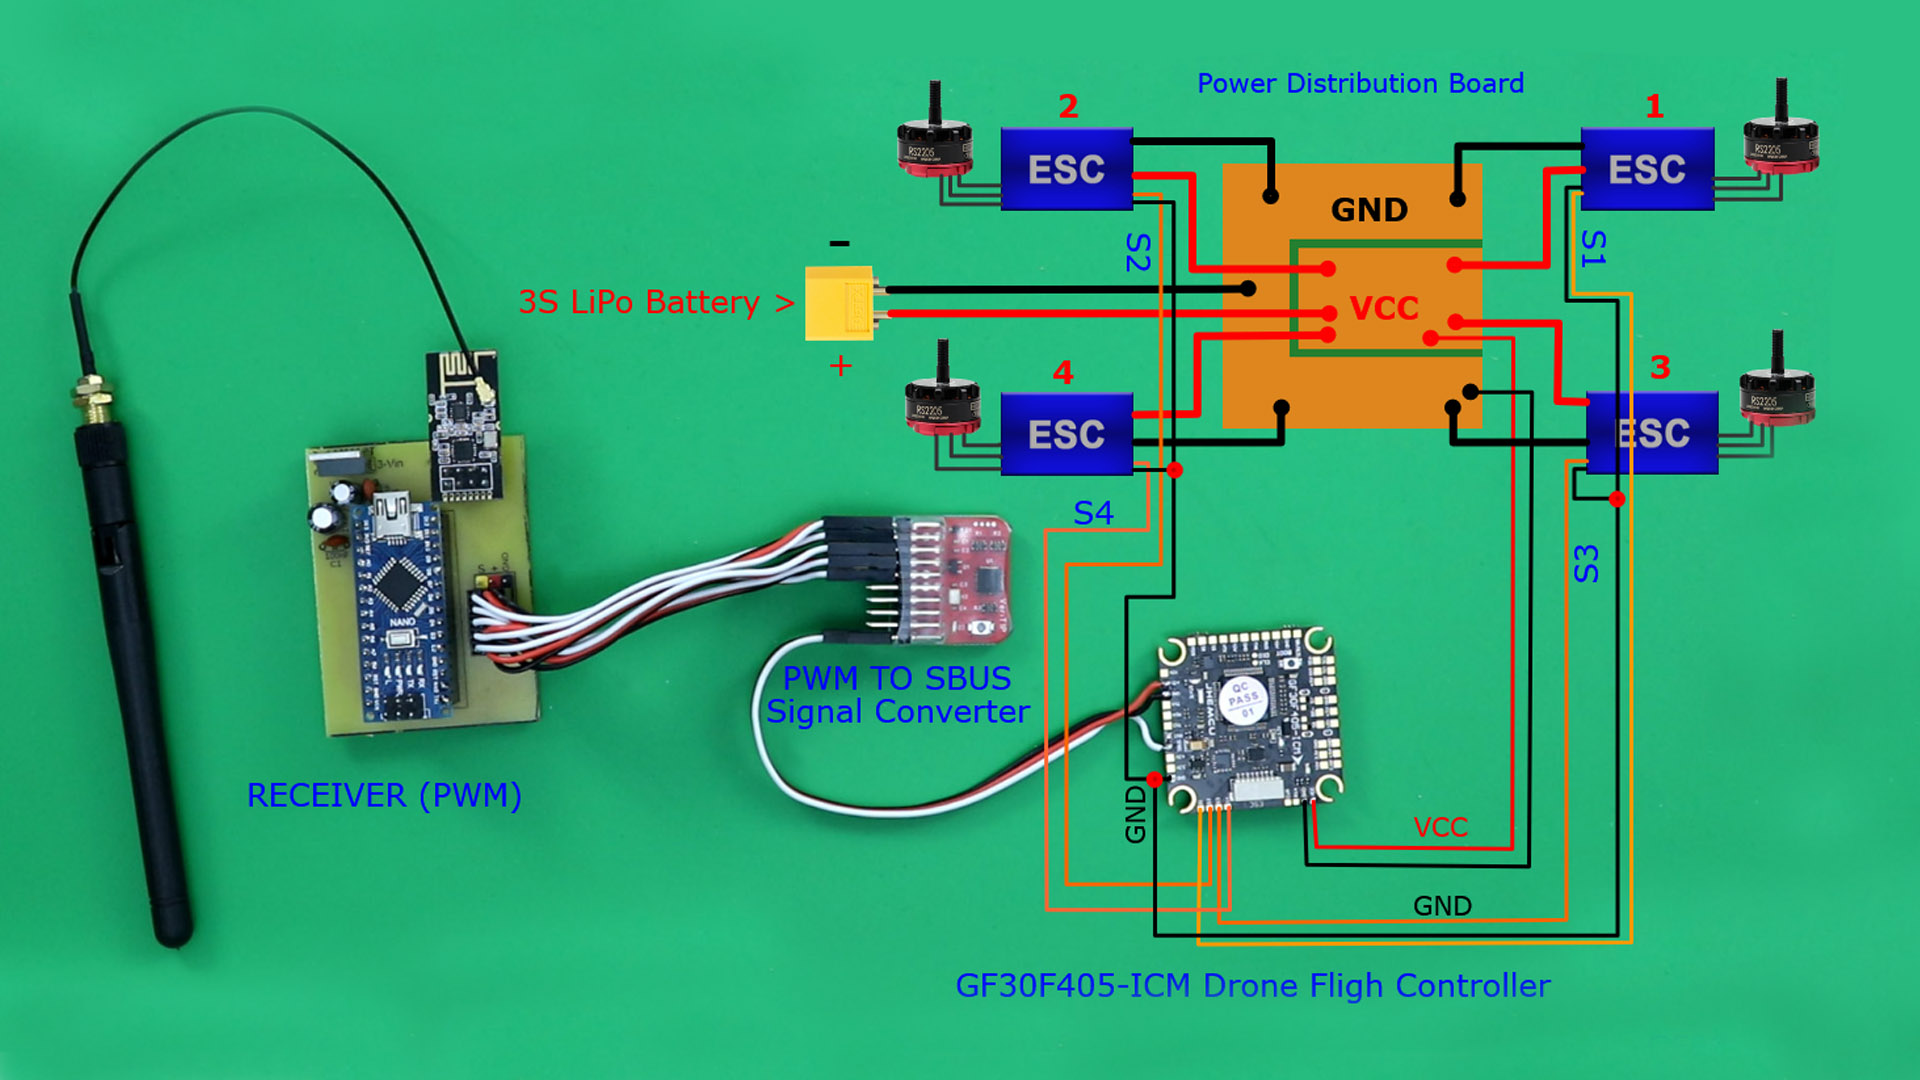
Daha önce yapım videosunu paylaştığım Arduino uzaktan kumanda ile 3D baskı drone nasıl yapılır? İsteğe bağlı olarak FPV sistemi eklenebilir. FPV kamera ve Gopro için uyumlu olacak şekilde bir tasarım yaptım.
BL Motor 2205 2300KV: https://s.click.aliexpress.com/e/_Dki3d91
ESC 20A BL: https://s.click.aliexpress.com/e/_DepNmoT OR https://s.click.aliexpress.com/e/_DF1tdIj
Flight Controller board: https://s.click.aliexpress.com/e/_DFxaPcn
PWM To SBUS Converter: https://s.click.aliexpress.com/e/_DF7ppCX
5045 3-Blade Propellers: https://s.click.aliexpress.com/e/_DlgNnnl
M3 Screws: https://s.click.aliexpress.com/e/_DBJhYmJ
M3x10mm (6 pcs), M3x16 (4 pcs), M3x10mm (4 pcs), M3x8mm (16 pcs), M3x4mm (2PCS)
Male To Male Extension Cable: https://s.click.aliexpress.com/e/_Dk1G6uF
Tape: https://s.click.aliexpress.com/e/_DmMPg55
Bu Drone için elimde zaten var olan model uçak ESC lerini kullandım. özel olarak Drone lar için üretilmiş yüksek performanslı ESC ler ile kullanılırsa çok daha kararlı bir uçuş elde edersiniz.
20A Drone ESC : https://s.click.aliexpress.com/e/_DnEBM4j
3D Printer İçin STL Dostaları: https://www.printables.com/model/916200-fpv-drone
____________ Uzaktan Kumanda Yapımı ____________
Diagram, detaylar ve dosyalar: https://www.rcpano.net/2023/12/30/how-to-make-6-channel-radio-control-range-2000m/
Drone için verici kodu:
// 6 Channel Transmitter | 6 Kanal Verici
// KendinYap Channel

  #include <SPI.h>
  #include <nRF24L01.h>
  #include <RF24.h>
  const uint64_t pipeOut = 0xABCDABCD71LL;         // NOTE: The address in the Transmitter and Receiver code must be the same "0xABCDABCD71LL" | Verici ve Alıcı kodundaki adres aynı olmalıdır
  RF24 radio(9, 10);                               // select CE,CSN pin | CE ve CSN pinlerin seçimi

  struct Signal {
  byte throttle;
  byte pitch;
  byte roll;
  byte yaw;
  byte aux1;
  byte aux2;

};
  Signal data;
  void ResetData()
{
  data.throttle = 0;
  data.pitch = 127;
  data.roll = 127;
  data.yaw = 127;
  data.aux1 = 0;
  data.aux2 = 0;

}
  void setup()
{
                                       // Configure the NRF24 module  | NRF24 modül konfigürasyonu
  radio.begin();
  radio.openWritingPipe(pipeOut);
  radio.setChannel(100);
  radio.setAutoAck(false);
  radio.setDataRate(RF24_250KBPS);    // The lowest data rate value for more stable communication  | Daha kararlı iletişim için en düşük veri hızı.
  radio.setPALevel(RF24_PA_MAX);      // Output power is set for maximum range  |  Çıkış gücü maksimum menzil için ayarlanıyor.
  radio.stopListening();              // Start the radio comunication for Transmitter | Verici için sinyal iletişimini başlatır.
  ResetData();

}
                                      // Joystick center and its borders | Joystick merkez ve sınırları
  int Border_Map(int val, int lower, int middle, int upper, bool reverse)
{
  val = constrain(val, lower, upper);
  if ( val < middle )
  val = map(val, lower, middle, 0, 128);
  else
  val = map(val, middle, upper, 128, 255);
  return ( reverse ? 255 - val : val );
}
  void loop()
{

  data.roll = Border_Map( analogRead(A3), 0, 512, 1023, true );        // CH1   Note: "true" or "false" for signal direction | "true" veya "false" sinyal yönünü belirler
  data.pitch = Border_Map( analogRead(A0), 0, 512, 1023, false );       // CH2
  data.throttle = Border_Map( analogRead(A2),0, 340, 570, true );      // CH3   Note: For Single side ESC | Tek yönlü ESC için
  // data.throttle = Border_Map( analogRead(A2),0, 512, 1023, true );  // CH3   Note: For Bidirectional ESC | Çift yönlü ESC için
  data.yaw = Border_Map( analogRead(A1), 0, 492, 1023, true );        // CH4
  data.aux1 = digitalRead(0);                                          // CH5
  data.aux2 = digitalRead(3);                                          // CH6

  radio.write(&data, sizeof(Signal));
}
Drone için alıcı kodu:
//  6 Channel Receiver | 6 Kanal Alıcı
// KendinYap Channel

#include <SPI.h>
#include <nRF24L01.h>
#include <RF24.h>
#include <Servo.h>

int ch_width_1 = 0;
int ch_width_2 = 0;
int ch_width_3 = 0;
int ch_width_4 = 0;
int ch_width_5 = 0;
int ch_width_6 = 0;

Servo ch1;
Servo ch2;
Servo ch3;
Servo ch4;
Servo ch5;
Servo ch6;

struct Signal {

byte throttle;
byte pitch;
byte roll;
byte yaw;
byte aux1;
byte aux2;

};

Signal data;

const uint64_t pipeIn = 0xABCDABCD71LL;
RF24 radio(9, 10);

void ResetData()
{

data.throttle = 0;                                         // Define the inicial value of each data input. | Veri girişlerinin başlangıç değerleri
data.roll = 127;
data.pitch = 127;
data.yaw = 127;
data.aux1 = 0;
data.aux2 = 0;

}

void setup()
{
                                                           // Set the pins for each PWM signal | Her bir PWM sinyal için pinler belirleniyor.
  ch1.attach(2);
  ch2.attach(3);
  ch3.attach(4);
  ch4.attach(5);
  ch5.attach(6);
  ch6.attach(7);

  ResetData();                                             // Configure the NRF24 module  | NRF24 Modül konfigürasyonu
  radio.begin();
  radio.openReadingPipe(1,pipeIn);
  radio.setChannel(100);
  radio.setAutoAck(false);
  radio.setDataRate(RF24_250KBPS);                         // The lowest data rate value for more stable communication  | Daha kararlı iletişim için en düşük veri hızı.
  radio.setPALevel(RF24_PA_MAX);                           // Output power is set for maximum |  Çıkış gücü maksimum için ayarlanıyor.
  radio.startListening();                                  // Start the radio comunication for receiver | Alıcı için sinyal iletişimini başlatır.

}

unsigned long lastRecvTime = 0;

void recvData()
{
while ( radio.available() ) {
radio.read(&data, sizeof(Signal));
lastRecvTime = millis();                                    // Receive the data | Data alınıyor
}
}

void loop()
{
recvData();
unsigned long now = millis();
if ( now - lastRecvTime > 1000 ) {
ResetData();                                                // Signal lost.. Reset data | Sinyal kayıpsa data resetleniyor
}

ch_width_1 = map(data.roll, 0, 255, 1000, 2000);
ch_width_2 = map(data.pitch, 0, 255, 1000, 2000);
ch_width_3 = map(data.throttle, 0, 255, 900, 2100);
ch_width_4 = map(data.yaw, 0, 255, 1000, 2000);
ch_width_5 = map(data.aux1, 0, 1, 1000, 2000);
ch_width_6 = map(data.aux2, 0, 1, 1000, 2000);

ch1.writeMicroseconds(ch_width_1);                          // Write the PWM signal | PWM sinyaller çıkışlara gönderiliyor
ch2.writeMicroseconds(ch_width_2);
ch3.writeMicroseconds(ch_width_3);
ch4.writeMicroseconds(ch_width_4);
ch5.writeMicroseconds(ch_width_5);
ch6.writeMicroseconds(ch_width_6);

}

