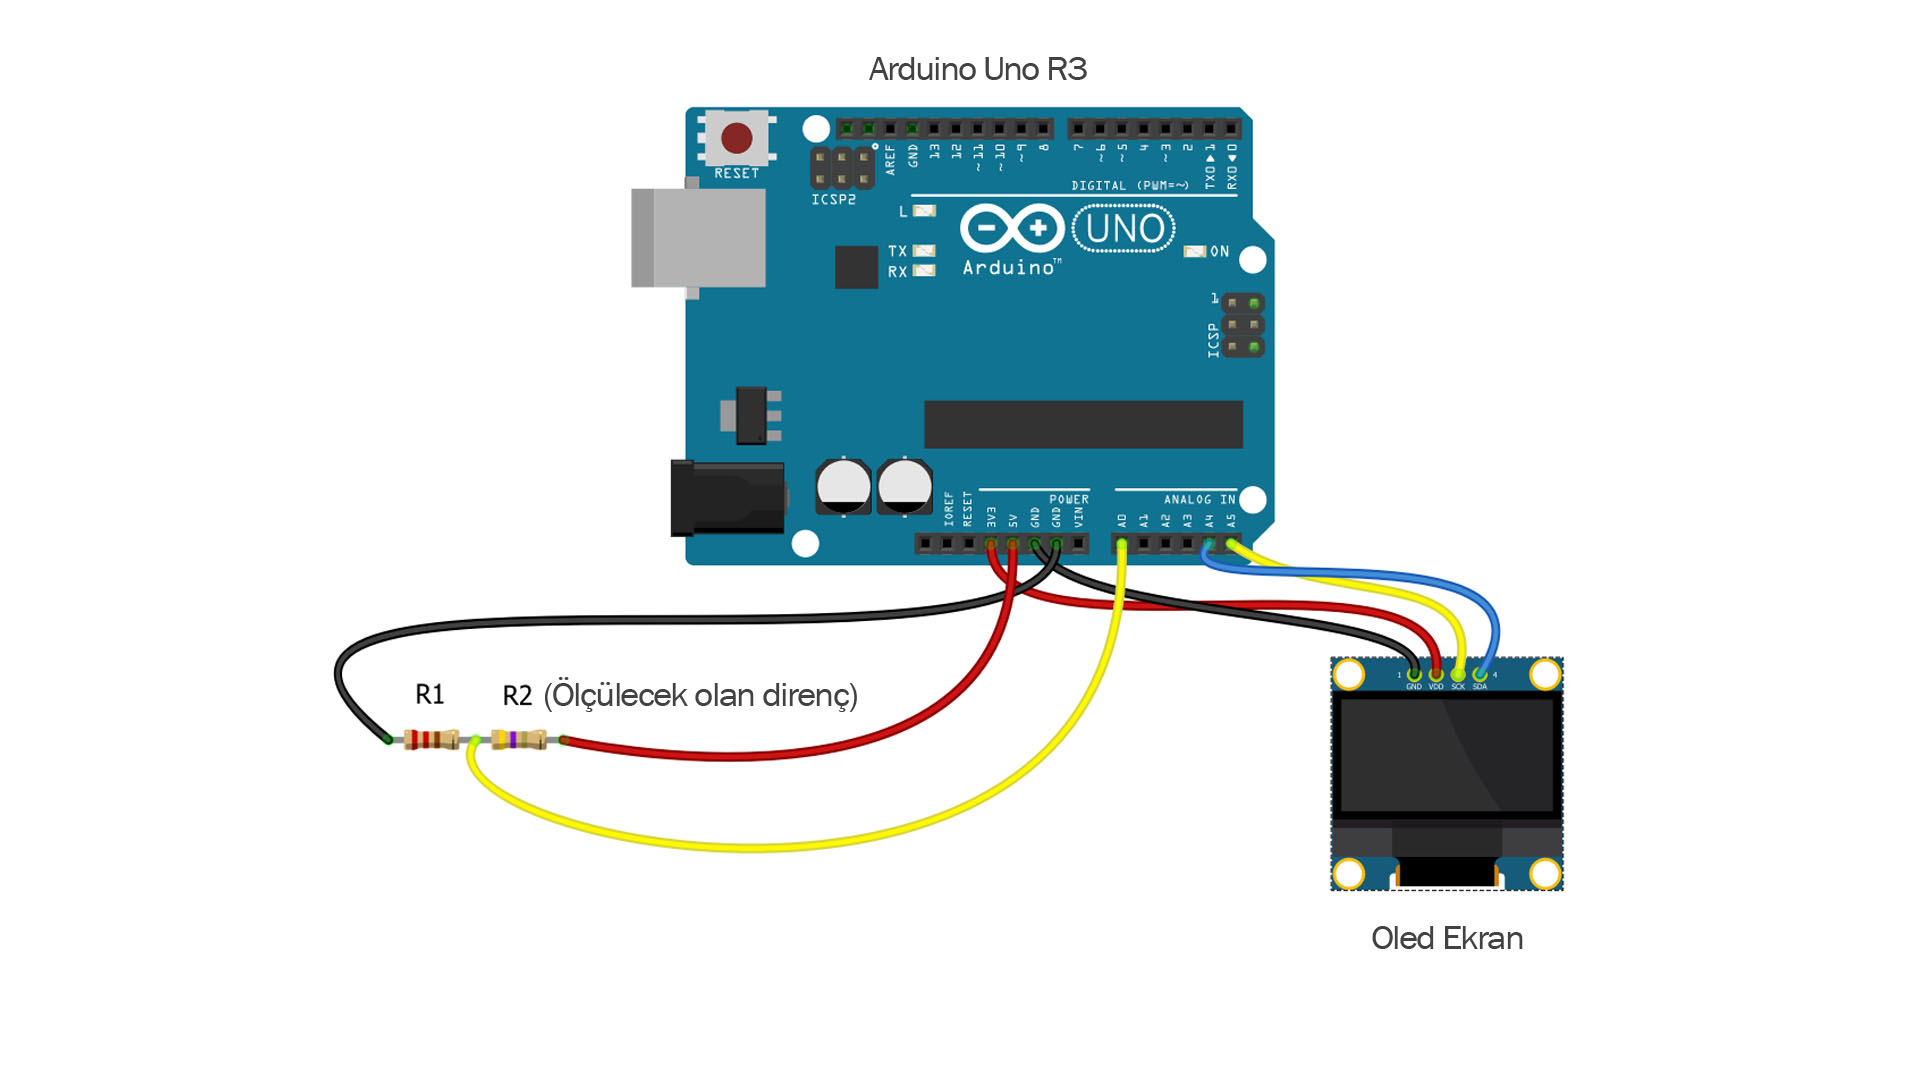
Resistor Value Measurement with Arduino
R1 resistor is fixed resistor. We must assign the value of the resistance we use as R1 in ohms to the R variable in the code. In this example, 10K resistor is used as R1 resistor. Since the real value of the measurement with multimeter was determined as 9.98K, 9980 value was assigned to variable R. R2 is the resistance we want to measure.

Ohm Meter Arduino Code:
#include <Adafruit_GFX.h>
#include <Adafruit_SSD1306.h>
Adafruit_SSD1306 display;

int analogPin=0;
int ap=0;
float Vout=0;
float R=9980; //Known Resistor value in Ohm
float resistor=0;
float buffer=0;
String symbol;
float Data=0;

void write_screen(void) {
  display.clearDisplay();
  display.setTextColor(WHITE);

  display.setCursor(0,0);
  display.setTextSize(2);
  display.print("Direnc");

  display.setCursor(0,20);
  display.setTextSize(1);
  display.print(resistor);
  display.setCursor(86,20);
  display.setTextSize(1);
  display.print("Ohm");

  display.setTextSize(2);
  display.setCursor(0,40);
  display.setTextSize(2);
  display.print(Data);
  display.setCursor(84,40);
  display.setTextSize(2);
  display.print(symbol);
  display.display();
}

void setup()
{
  display.begin(SSD1306_SWITCHCAPVCC, 0x3C);
}

void loop()
{

ap=analogRead(analogPin);
buffer=ap*5;
Vout=(buffer)/1024.0;
buffer=(5/Vout)-1;
resistor=R*buffer;
Data=resistor;

if (Data<999) {
  symbol = "R";
  write_screen();
}
if (Data>999 && Data<999999) {
  Data=Data/1000;
  symbol = "K";
  write_screen();
}
if (Data>999999) {
  Data=Data/1000000;
  symbol = "M";
  write_screen();
}
   write_screen ();
   delay(1000);
  }